Layer Actions
When you click the More Options menu (⋮) on any layer, you can do several tasks and actions:
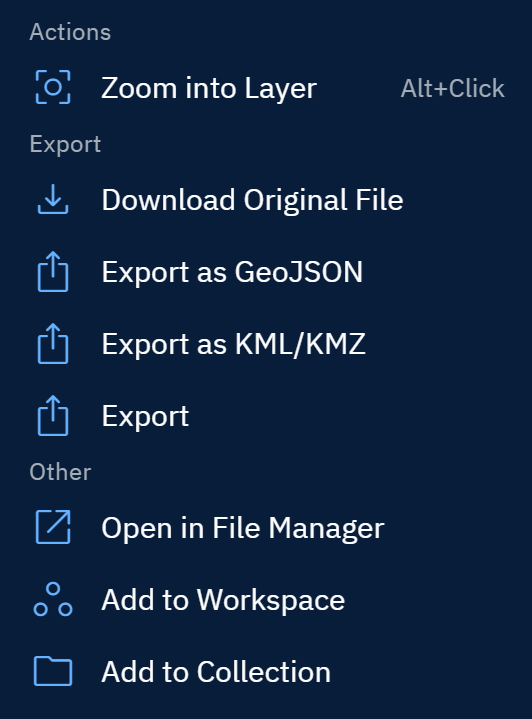
Zooming into Layer
Use this option to zoom into the layer on the map.
To zoom into a layer, do the following:
-
Locate a layer that you want to zoom in and then click the ⋮ (More Options) next to the layer.
-
Select Zoom into Layer (or hold Alt and click the layer).
The platform turns on the visibility and zooms in to the layer.
Downloading Original File
Use this option when you want to maintain the image fidelity for offline analysis, audits, or archiving.
To download original file, do the following:
-
Locate a layer that you want to zoom in and then click the ⋮ (More Options) next to the layer.
-
Select the Download Original File option.
The platform downloads the file on your local computer.
Very large rasters/archives may take time; ensure sufficient local disk space.
Exporting as GeoJSON
Use this option to convert a vector layer to GeoJSON. Ideal for pipelines that expect JSON (APIs, Node/Python stacks).
To export as geojson, do the following:
-
Locate a layer that you want to zoom in and then click the ⋮ (More Options) next to the layer.
-
Select the Export as GeoJSON option.
The platform downloads the file on your local computer.
Exporting as KML/KMZ
What it does Use this option to exports as KML (plain) or KMZ (zipped with styles/icons). Ideal for maintaining simple symbology in a portable format (KMZ bundles icons).
To export as kml/kmz, do the following:
-
Locate a layer that you want to zoom in and then click the ⋮ (More Options) next to the layer.
-
Select the Export as KML/KMZ option.
The platform downloads the file on your local computer.
Exporting
Use this option to select one of the export options namely geojson, csv, kml, or shaprefile.
To export a layer , do the following:
-
Locate a layer that you want to zoom in and then click the ⋮ (More Options) next to the layer.
-
Select the Export option.
The Export Annotations dialog box is displayed.
- In the Export Annotations dialog box, select one of the following options and then click the Export button.
- geojson
- csv
- kml
- shapefile
The platform downloads the file on your local computer.
Open in File Manager
Use this option to view layer metadata and other information.
To open in file manager, do the following:
-
Locate a layer that you want to zoom in and then click the ⋮ (More Options) next to the layer.
-
Select the Open in File Manager option.
The platform open the layer in the File Manager in the same browser tab.
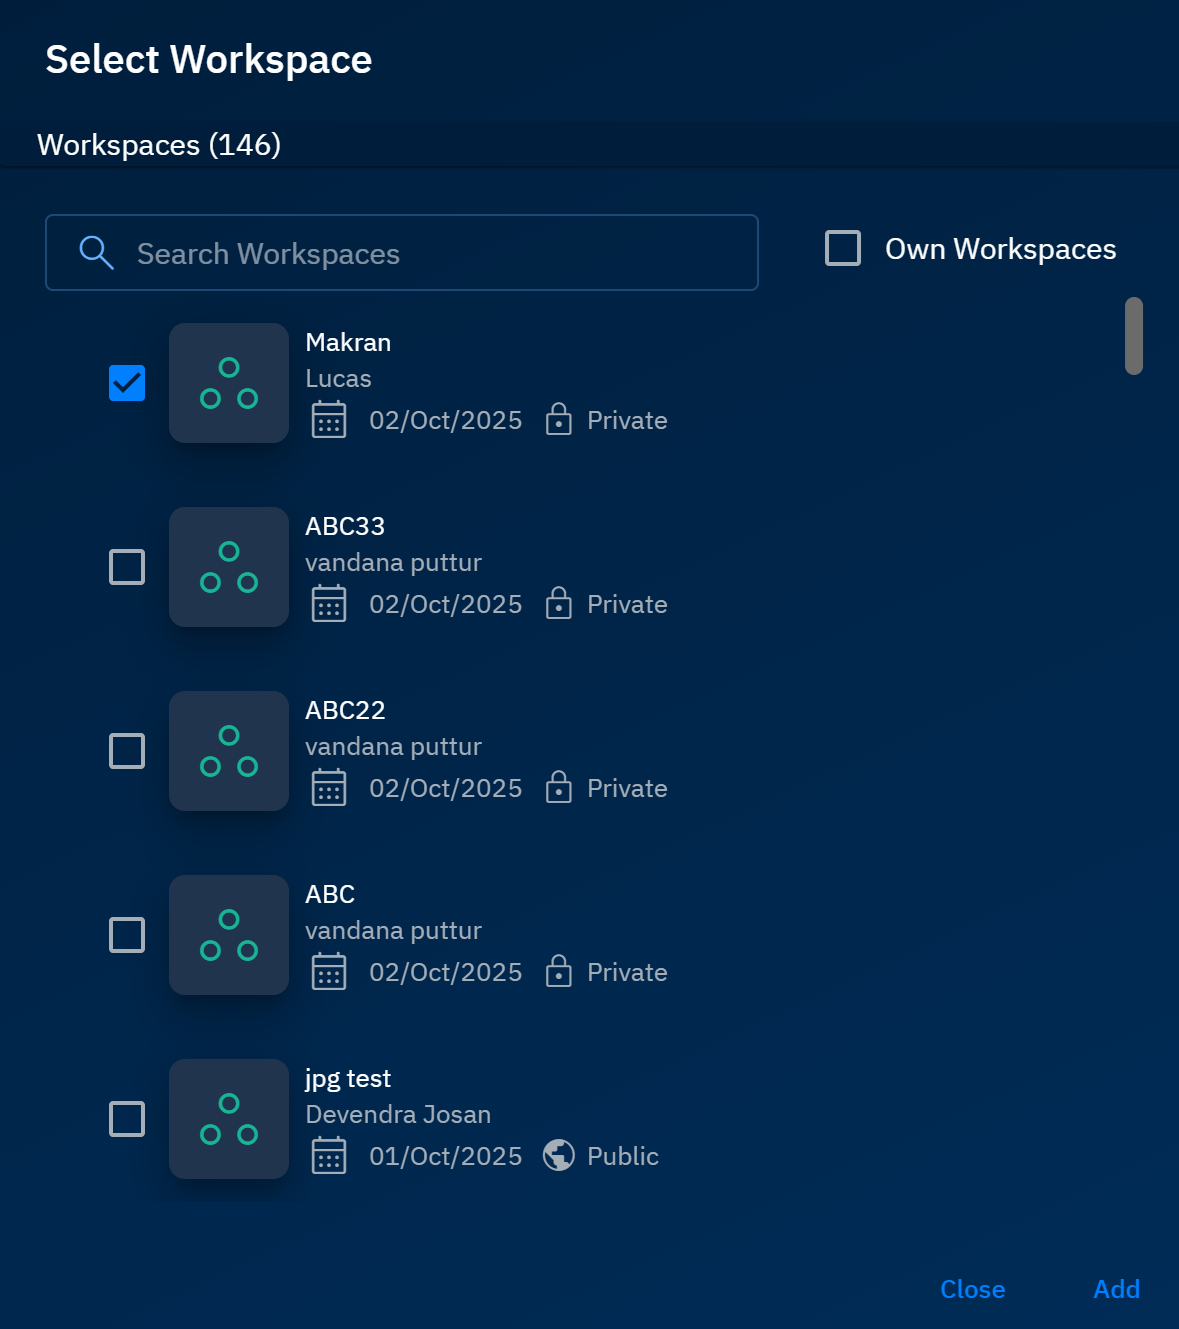
Adding to Workspace
Use this option to add the layer to a chosen Workspace so it appears on the map and in the workspace’s Layers panel.
To add layer to workspace, do the following:
-
Locate a layer that you want to zoom in and then click the ⋮ (More Options) next to the layer.
-
Select the Add to Workspace option.
The Select Workspace dialog box is displayed.
- In the Select Workspace dialog box, do one of the following:
-
Type a name of the workspace (where you want to add the layer), select the workspace, and then click the Add button.
-
Select the Own Workspaces check-box to view workspaces owned by you, select a workspace, and then click the Add button.
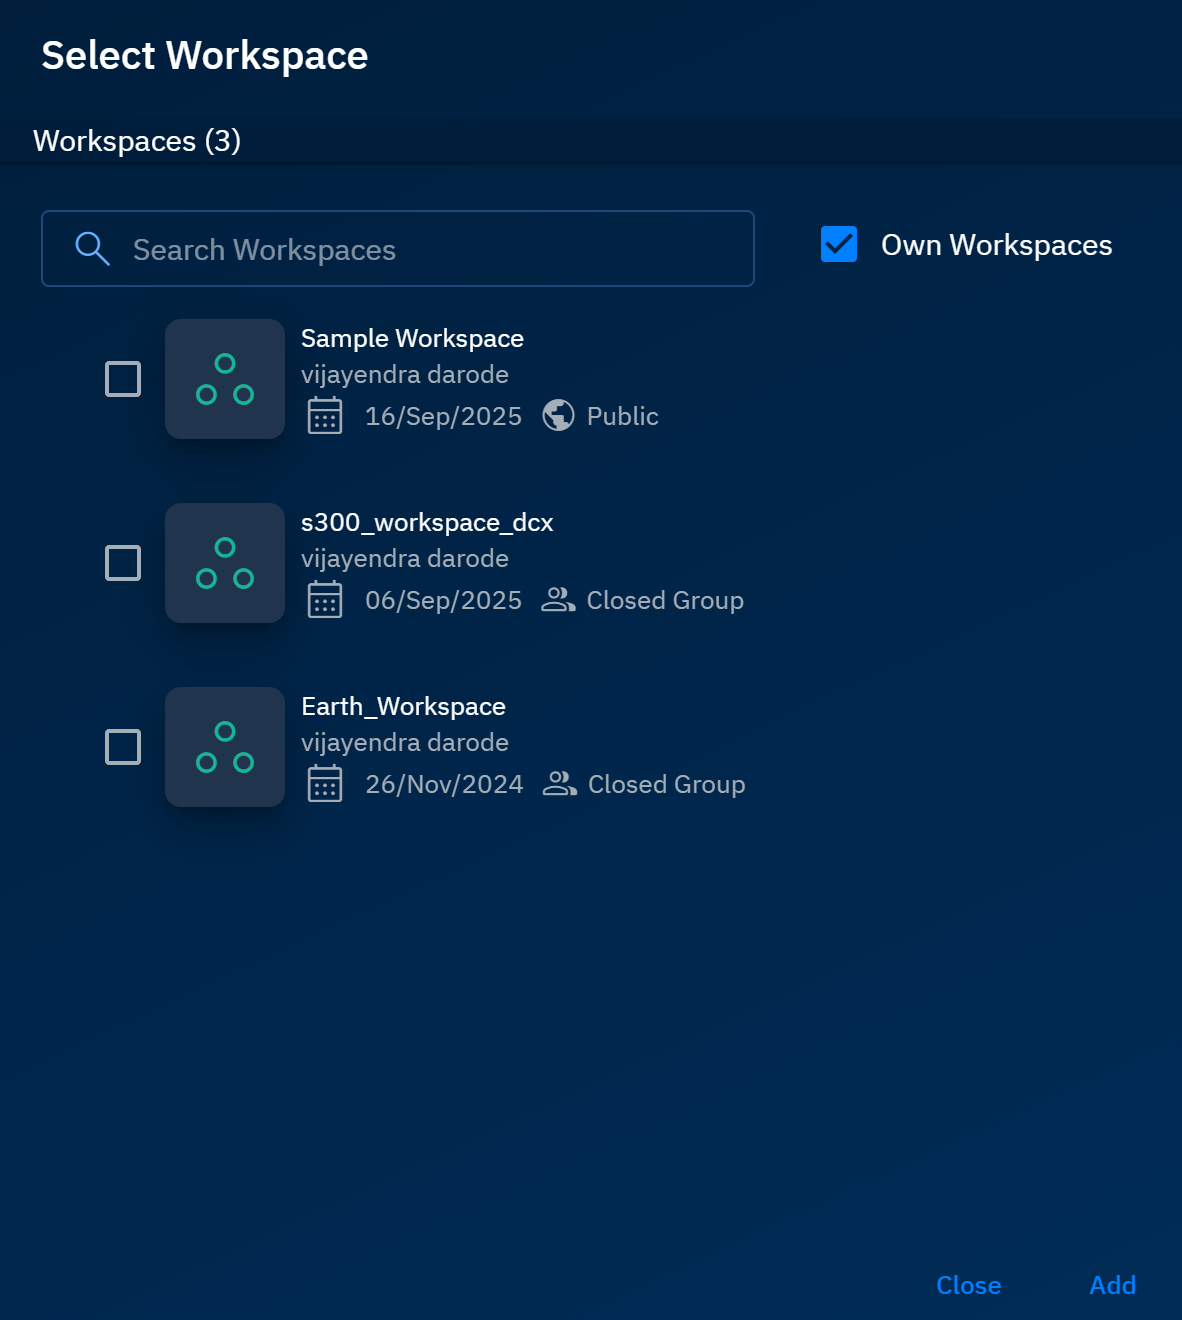
The platform adds the layer to the workspace.
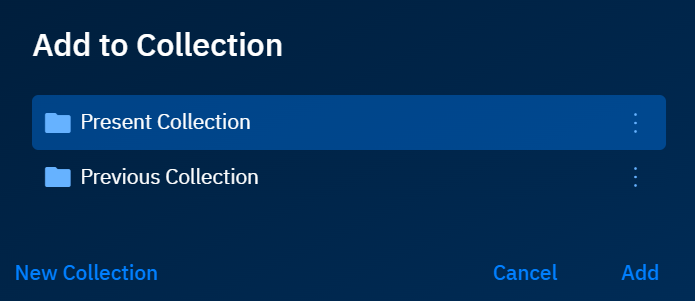
Adding to Collection
Use this option to saves the layer into a thematic set called Collection.
To add layer to a collection, do the following:
-
Locate a layer that you want to zoom in and then click the ⋮ (More Options) next to the layer.
-
Select the Add to Collection option.
The Add to Collection dialog box is displayed.
- In the Add to Collection dialog box, do one of the following:
-
Select a previously created collection and then click the Add button.
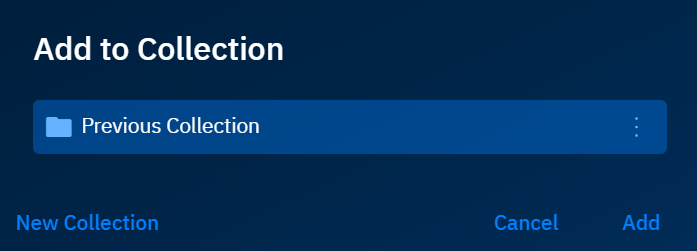
-
Click the New Collection button, type a name, and then click the Add button.